Happy New Year and the New ARB Awning
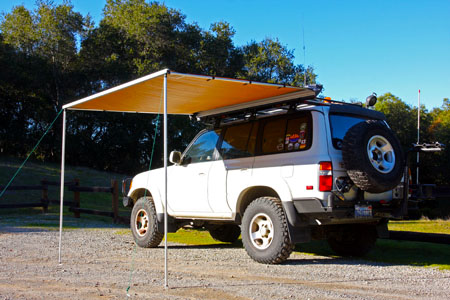
Happy 2013! Personally, I’m hoping for an exciting year, with plenty of trips and adventures… And some budgetary stability sure wouldn’t hurt, either! I hope everyone had a great holiday season and also has a fantastic 2013 ahead.
We’ve started the year with a family hike in Sierra Azul and a family bike ride on our usual creek trail. On Christmas I got a set of 118db Hella Supertone Horns for the Land Cruiser that I swapped in that afternoon. They’re higher-pitched than I would like but they’re “hella” loud!
My big shock Christmas gift this year was a new ARB awning for Toyotie. Imagine my surprise on evening close to Christmas when I am standing at my front door, and the UPS guy comes marching into my yard with an eight-foot tube on his shoulder! We took it from him and set it down inside the house. Then I was promptly shooed away by the girls who were also abuzz, as they tried to figure out what exactly to do with this… this… this thing. It obviously wouldn’t fit under the tree, since it was taller by a few inches!
After about sixty seconds of whispered, frantic discussion they seemed to have thrown in the proverbial towel. Carrie found me and asked if I might want to open one of my presents early? Hahaha! I sympathized and agreed, and that’s how I got my awning. It was a huge (literally as well as figuratively) surprise to get it, and someone rightly described it as an “epic” Christmas gift. Thanks, hon!
The ARB awning has been part of my build plan for Toyotie since the start. I considered several other options but opted to go with the ARB model because of size, price, construction and durability, ease of use, and product support. I also had a chance to examine several awnings in person over the last year. The early frontrunner was the Hannibal awning, which needs no support poles or tie-downs, which is simply wonderful. But it’s like four times the price of the ARB, while availability and product support in the US has been problematic. The final deal-killer for me was that I didn’t think my rack was long enough to work the 2.4-meter version, and I knew that the 1.86-meter model was just way too small.
My awning is an ARB model 2500 awning, with “2500” representing the 2500mm length, which is 2.5 meters or 8.2 feet. Carrie purchased it from Amazon.com, where it is listed as stock number ARB3108 Brown 8′ Awning. It currently lists for $229.95, with free shipping.
Because we had a string of rainstorms, I delayed the installation of the awning until several days after Christmas. In the meantime, I pulled out the instruction booklet, checked out the awning’s aluminum mounting channel and the supplied hardware. Checking online, I’d seen that ARB sold an optional rack installation kit as well. I checked it – and several other mounting options – out via Google, paying close attention to different photos. Then I started brainstorming how I wanted to go about getting the awning attached to my INTI roof rack on the Land Cruiser.
It seemed that my best bet was to attach the awning to the vertical bars on the roof rack. This would give me several mounting points, allow some flexibility in the placement of those points, and also mount the rack high on the rack. The latter would help with headroom under the awning when it was deployed, and it also meant that the awning wouldn’t obstruct the side running lights on the rack. That said, it wasn’t how most people mouned the awning, so I was going to be on my own to some degree.
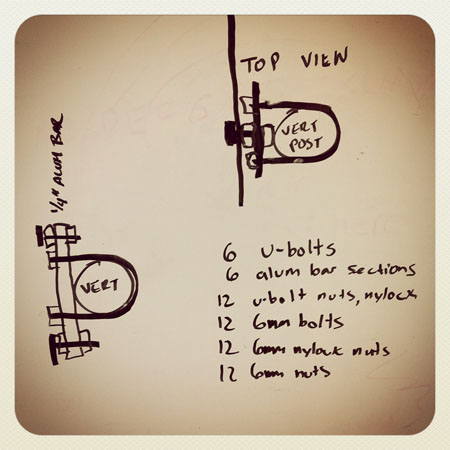
How exactly to mount it was something of a design challenge. The aluminum channel on the awning ruled out the simple use of U-bolts. I ended up making some sketches on the whiteboard in my garage to help me visualize things, and considered several options including making some simple bars to make the U-bolts work. In the end, I decided that I could use stainless steel hose clamps, along with short 6mm bolts and nyloc bolts as a simple but very secure way to attach the awning.I also figured that this would be one of the less-difficult ways to get it positioned properly on the rack. It also meant I could avoid drilling into the rack itself.
ARB recommends having three (and a minimum of two) mounting points, using six (minimum four) 6mm bolts. My installation used five mounting points and nine 6mm bolts, so it should be quite robust and solid. Since getting it in place, I have checked everything a few times and so far everything is still secure and tight.
My installation was pretty simple, and took maybe two hours including the work needed on the hose clamps. My wife helped me lift the awning into position for the test fitting, take it down again, and put it back for the final installation. Despite the awning’s length and size, it only weighs something like 25lb., so lifting it was never an issue.
That pretty much sums it up, but there are photos and more details in the photo gallery.
Drive #4: Mt. Hebo
Drive #4 – Mt. Hebo
Dates Driven: 12/26/05 and 11/21/12
Length: 16.8 miles round trip
My drive time: 50 minutes
Start: N45º 13.817′ W123º 51.676′.
End: Same as start.
<GPS Track: GPX or KMZ format. (right click -> Save As)
Source(s): N/A
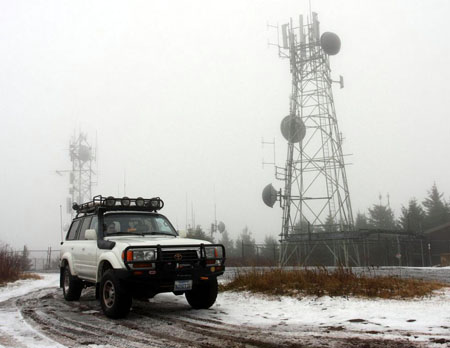
Summary: This paved backroad drive takes you from the tiny town of Hebo (elevation about 64 feet) to the top of Mt. Hebo at 3200′. The peak offers either extreme weather or long-distance views.
Description: The drive to Mt. Hebo is a simple backroad drive, although in winter the weather can make things a little challenging with snow, ice and fallen branches. Or fallen trees, for that matter! I’ve been to the peak twice, and have been hailed on both times. That’s what I get for going in winter…
When we went up this year, I knew from the ham radio folks that have a repeater station at the summit (including several webcams) that a fallen tree had been cleared the day before, just after a big winter storm had hit. There were small branches everywhere on the drive up, and a few larger ones to avoid, but nothing major. The snow level was well under 2,000′ but there wasn’t much accumulation or ice. I drove slowly & had no issues at all.
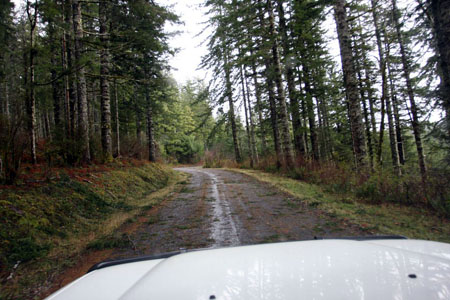
There is a seasonal campground at Lake Hebo along the drive up. Mt. Hebo is part of the Siuslaw National Forest and they have a full web page dedicated to the recreational opportunities in the area, including hiking and horseback riding. There are geocaches and benchmarks for those like me who enjoy that sort of thing.
Mount Hebo Air Force Station (AFS) used to be located on the summit. Check out the great photos and information at the radomes.org site, which give an idea of what it was like to winter-over up there!
When the weather cooperates, the views from the top can be pretty impressive. Even without them, I have enjoyed our visits here, and the chance to spend time in the snow and woods.
Disclaimer – This information is provided from the best of my recollection and is necessarily subjective. GPS data is from a personal device inside my vehicle, so coordinates will not be exact. Use of any of this information is at your own risk and responsibility – period. Conditions change (especially in winter), vehicles and driver skills vary, etc. and I have no control over these things. Don’t let anything written here override your own personal common sense or safety.
Drive #3: North Fork of the Siuslaw River
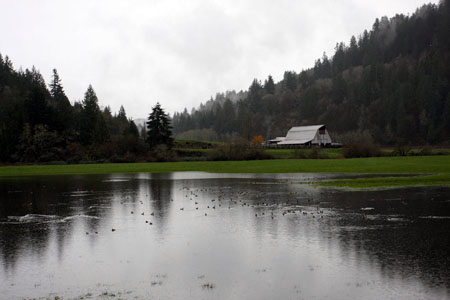
North Fork of the Siuslaw River
Date Driven: 11/24/12
Length: 35.5 miles (11.7 miles of dirt)
My drive time: 1 hour 25 minutes
Start: N44º 11.5585′ W124º 06.801′.
End: N43º 58.596′ W124º 05.046′.
GPS Track: GPX or KMZ format. (right click -> Save As)
Source(s): Coos Bay Wagon Road is Drive #14 in Oregon Byways. I drove it in reverse direction from the book.
Summary: A combination of farmland backroads and both paved and dirt Forest Service roads, providing a scenic alternative to the highway along the Oregon coast.
Description: Beginning from a wooded section of coastal Highway 101, take Fairview Mountain Road heading east. You head uphill and quickly lose the pavement. A sign on the drive up reminds you to keep the forests free of trash, a sentiment I completely endorse. Soon you’re in the trees as you continue to climb to the top of this coastal ridge.
The dirt road was an easy drive when we did it, with the usual ruts, rocks, and bumps here and there. Because a big winter storm had just recently blown through, the forest roads here were littered with small downed branches, but anything big had been cleared away before we passed through.
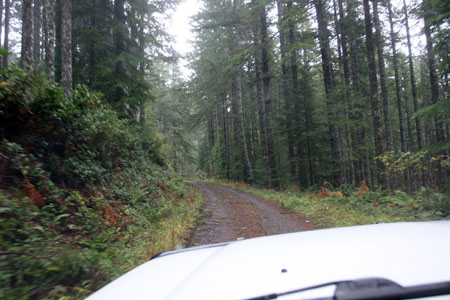
Eventually you reach the top of the ridge and start a descent down the eastern side. There are numerous side roads to choose from, and to explore if you’re so inclined. I had previously mapped out our route (in reverse direction from how it is shown in Oregon Byways) and picking the roads was not easy. I did my best to stay true to what I believed was the route laid out in the book, but whether or not I succeeded is probably open to interpretation.
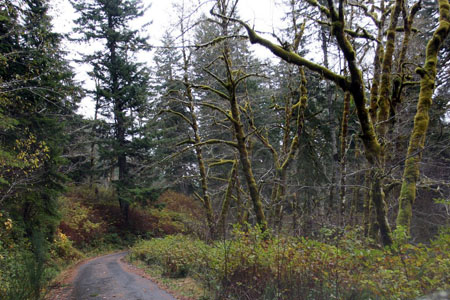
Descending through the forest, soon the pavement returns (unfortunately) although the road remains narrow. It slowly widens to two lanes, and some remote houses and farms appear as you reach the flatlands again. 15 miles of the paved North Fork Siuslaw Road wind though low farmlands and wide curves as you make your way towards Highway 126 on the east side of Florence. Many of the open valley farm fields were flooded when we drove through, and flocks of ducks swam around them.
There’s a parking lot for Bender Landing County Park at N44º 00.243′ W124º 04.271′, where there is a permanent and public vault restroom and water fountain available.
From there it’s just a few minutes to Highway 126 and the end of this drive. From there, we headed into old town Florence which has several restaurants, bakeries, coffee shops and other destinations. The ranger station/visitors center for Oregon Dunes is on the right side if you drive south across the bridge over the Siuslaw River.
This drive, like Coos Bay Wagon Road before it, was exactly wanted I wanted: a scenic dirt and backroad experience that spiced up an otherwise routine homeward drive, without adding a lot of time to an already long day. Mission accomplished!
North Fork of the Siuslaw River Photo Gallery
Disclaimer – This information is provided from the best of my recollection and is necessarily subjective. GPS data is from a personal device inside my vehicle, so coordinates will not be exact. Use of any of this information is at your own risk and responsibility – period. Conditions change (especially in winter), vehicles and driver skills vary, etc. and I have no control over these things. Don’t let anything written here override your own personal common sense or safety.
Drive #2: Coos Bay Wagon Road
Drive #2 – Coos Bay Wagon Road
Date Driven: 11/18/12
Length: 51 miles (14 miles of dirt)
My drive time: 1 hour 45 minutes
Start: N43º 05.598′ W123º 34.114′.
End: N43º 18.075′ W124º 12.656′.
GPS Track: GPX or KMZ format. (right click -> Save As)
Source(s): Coos Bay Wagon Road is Drive #15 in Oregon Byways.
Summary: A combination of rural and wooded backroads and well-maintained dirt forest roads, providing an alternative and scenic drive to the Oregon coast.
Description: I found this drive in Oregon Byways while researching potential routes on our 2012 Oregon road trip. It had all of the attributes I was looking for in drive for this trip: it was scenic, a fairly long drive, not far out of our way, and not a difficult technical route. I’d be traveling solo on these unfamiliar side routes, with the family, so I didn’t want to do anything too hardcore or that would frighten them. 🙂 I also didn’t want these side excursions to add too much time to our already-long daily drives.
I mapped out the route ahead of time in MapSource, which was a little tricky with the various turns and side roads, but not too bad. I also created key waypoints to download to my MotionX apps on my iPad 2. All of that worked out well and I was able to navigate through the entire drive with confidence, only having to pause on a couple of occasions when my GPS lost its fix near or at an intersection.
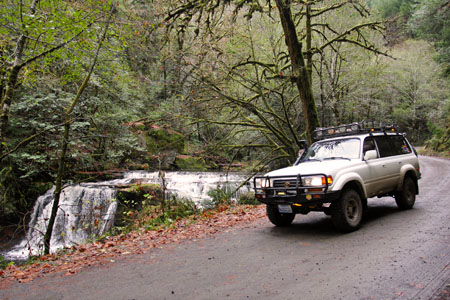
The drive starts off on a pleasant, paved rural backroad, then climbs up the wooded hills until you finally reach dirt around N43º 08.508′ W123º 42.140′ at Brewster Canyon. For the next 11 miles or so, you follow alongside the small, east fork of the Coquille River. There’s a spectacular waterfall along the way at N43º 08.912′ W123º 47.297′, and the Oregon Byways book says there was another nice one that we missed. There were some ruts and potholes but no real need for high clearance or 4WD when we were there. That might change later in winter and it could get a lot muddier, I don’t know.
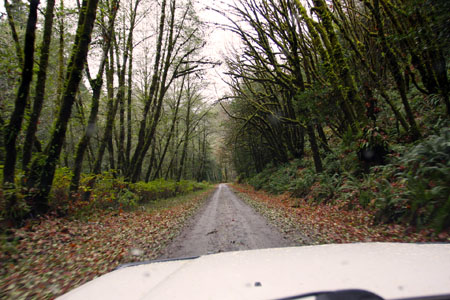
From there we emerged onto more paved backroads through some pretty rural country. Traffic here – and throughout the drive – remained sparse. Eventually we reached another short dirt stretch, then were back onto tarmac for the final segment where we eventually reached Highway 101, just south of Coos Bay.
For the offroader, Oregon Dunes is located between Coos Bay and Florence, which is the start/end of my next drive.
This was a very pleasant drive that offered a scenic, mildly-adventurous alternative to a section of our road trip drive that we’d already driven in the past. It met all of the criteria I was looking for, and was a wonderful way to add some fun to an otherwise routine drive.
Drives like this one are out there waiting, if you just make the effort to seek them out.
Coos Bay Wagon Road Photo Gallery
Video
This video begins just after the dirt started, and ends at the bridge where the drive ends at Highway 101. It’s comprised of one-per-minute snapshots along the way.
Disclaimer – This information is provided from the best of my recollection and is necessarily subjective. GPS data is from a personal device inside my vehicle, so coordinates will not be exact. Use of any of this information is at your own risk and responsibility – period. Conditions change (especially in winter), vehicles and driver skills vary, etc. and I have no control over these things. Don’t let anything written here override your own personal common sense or safety.


