Baofeng UV-5R, Part 2

Builder Bracket and radio.
The brackets are constructed from 14g steel and so are pretty much bombproof without being overly heavy. They are designed to hold a UV-5R with either a standard or extended battery pack. They come unfinished but can be used as-is.
– Editing CSVs and import into CHIRP can be tricky. It’s like your CSV gets converted to CHIRP then to the radio format, and things can get a little weird in the multiple translations. I also encountered some values listed in the CHIRP documentation that weren’t supported by the radio. Even after fixing that, I wasn’t able to import a CSV file I had edited with an expanded list of frequencies.
Some of this was likely the result of my inexperience with CHIRP. But in the end, I opted to download the settings from the radio again and edit directly in CHIRP, skipping the CSV completely, even though it would have been quicker. This worked fine and I now have a lot more frequencies programmed as memory channels.
– Google continues to be a necessity, given the lack of a proper operation manual. The UV-5R Facebook group and miklor.com have also proven to be useful resources.
– I was able to have memory channels display by name, instead of frequency.
– Using the UV-5R with the NA-717 antenna, I was able to hit and open my local repeater from a maximum distance of 24 miles north on I-5. Even better (because of the elevation no doubt), I could do the same from the top of the Altamont Pass, 31 miles to the west. In both cases, the reply from the repeater was weak and with a lot of static.
This testing has been quite limited and anecdotal, but early indications are that the radio has good TX power.
– I ordered and received a “builder bracket” for the radio. These are basic brackets designed for people who have a project in mind to mount their radio somewhere. I’m impressed with the thought that went into the design. Although I prefer to use a mobile rig in my vehicles, this will make for a good option in the Z4. It can easily be used with the excellent RAM mounts, like the one I already use in the Z4 for my iPhone. It can also be adapted for some other radios.
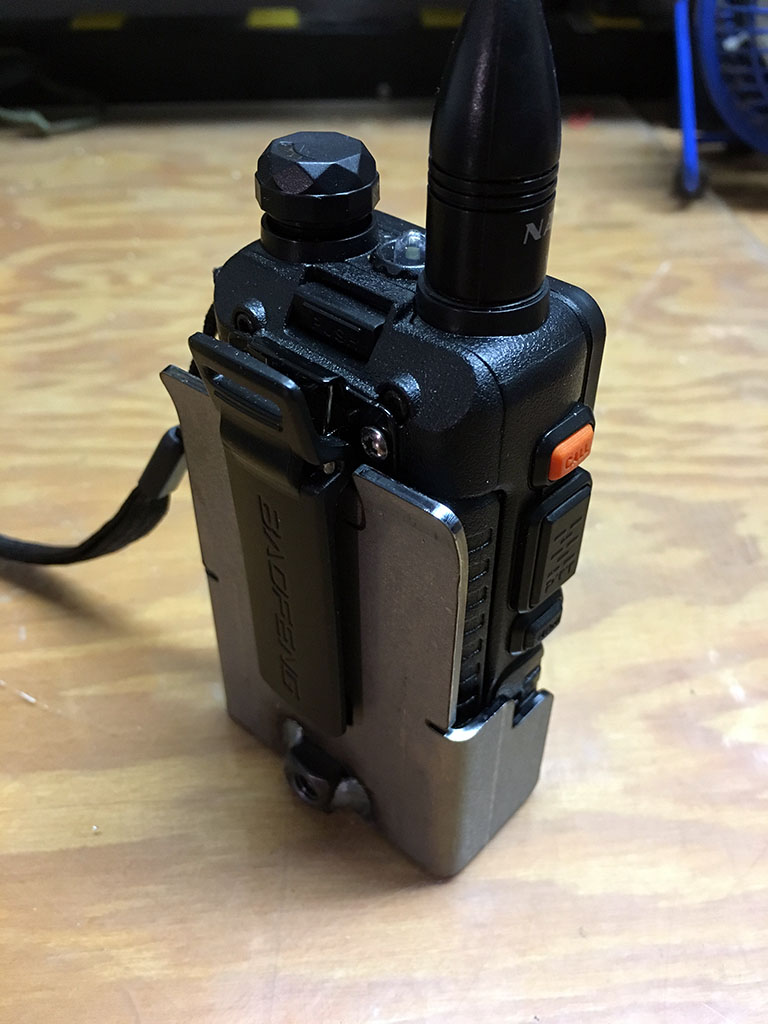
Radio inserted into bracket.
The radio’s belt clip fits over the top cutout on the back of the bracket, and the bottom of the clip sits in the lower slot. Once there, the radio is securely held in the bracket and won’t fall out at any angle unless you please the clip. There is a little play for the radio to move around a bit inside the bracket but that’s it.
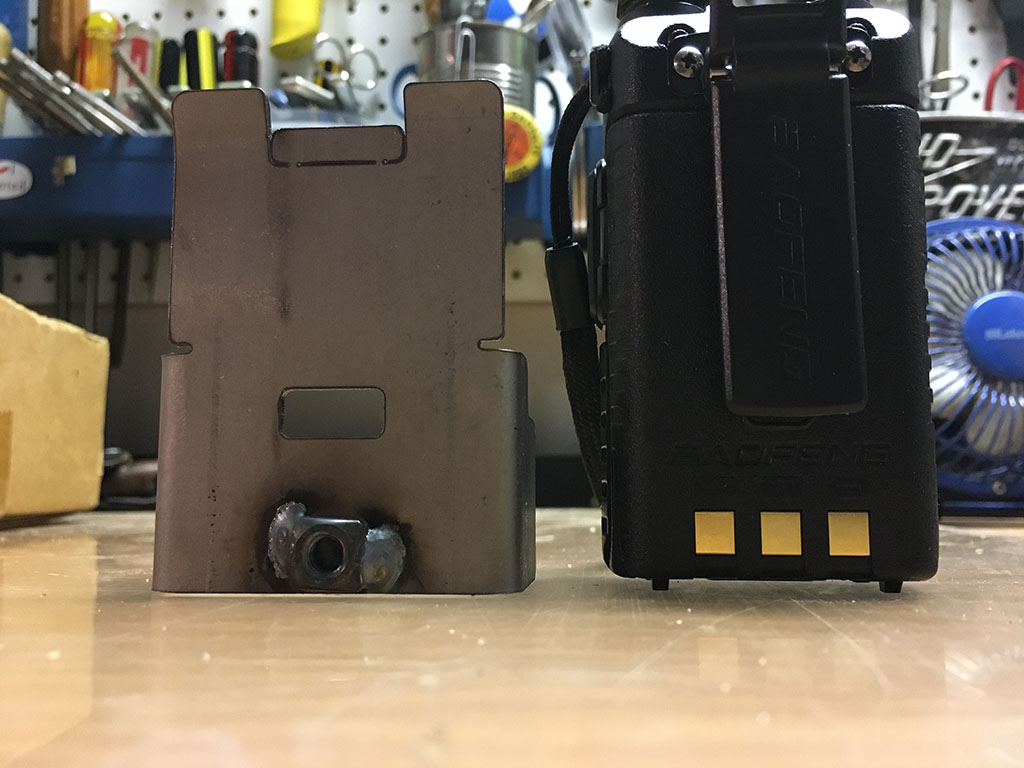
1/4-20 nut welded to the back.
This allows you to attach the bracket to a standard 1/4-20 bolt, a RAM standard 1” ball, or any number of camera tripod/monopod type mounts. Using a RAM 1” ball will allow you to swap it out in a common RAM mount arm without the use of tools. That’s how I plan to use mine, adding regular Loctite to the threads.
The brackets run $16 shipped from the guy in Arizona that makes them. Details and lots of related posts can be found in the Expedition Portal forum at http://www.expeditionportal.com/forum/threads/121298-Baofeng-UV5R-quot-Builder-Brackets-quot (ExPo registration probably required)
For more details see the image captions.
– Whoever decided that the charge station’s status LED should constantly blink rapid red/green when *not* in use needs to be located and pummeled.
So geek. Much Greek. But nice to see something new from BR Nav! 🙂
January 17th, 2017 at 2:30 am