Toyotie: The Particulars
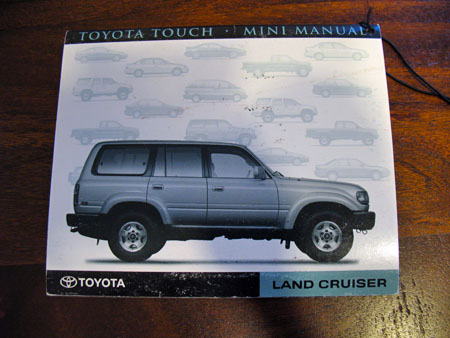
I recently did a quick (and exceptionally overdue) facelift on the rest of my website. As one of many updates I had in mind, it occurred to me that I should create an overview page for my Land Cruiser, rather than forcing anyone interested to sift through numerous old blog posts. So I’m detailing Toyotie here, and I’ll add a permanent link to this post from my Toyotie page.
My 1996 80-series Toyota Land Cruiser (FZJ80) shows a build date of 7/18/96, placing it close to the end of the ’96 model year. 1997 was the final year for the 80 series in the U.S., when production ceased in Japan. (Venezuela continued to produce the 80 series for local sales until 2008!)
The original MSRP is shown at $50,843, which is $75k when adjusted for inflation in 2012. Options include:
- White (0045) exterior
- Oak (LB42) interior
- Leather trim package
- RS3000 security system
- Gold package
- Factory aluminum alloy wheels
- Factory front & rear locking differentials
- Moon roof
- Burlwood dash
- Rear wind deflector
There was no factory roof rack, which was good, as there were no holes to plug. There are two “third row” folding leather seats which don’t appear to have ever been used. They are currently gathering dust in my garage.
When I bought it from another ExPo member in September 2011, he’d had it for around 5k miles. During that time he’d installed:
- A 4×4 Labs rear bumper with swing-out tire and dual fuel can carrier
- The OME Heavy 2.5” lift kit with castor bushings, OME shocks, OME steering stabilizer, OME 850 front springs and OME 863 rear springs
- An Alpine CDA-9833 head unit with KCA-420i iPod control unit and XM antenna
- Five BFG KM2 Mud Terrain tires, size 255/85R16
- A homemade roof rack, modeled after the INTI roof rack
- A Sears Platinum battery
- A Husky rear cargo liner
- A homemade rear drawer storage system.
In addition, a section of the rear driver-side door flare was half pulled-off, and the radio antenna was busted up. There’s a tear on one spot of the driver’s seat and some other minor issues here and there. The rear exhaust had been cut back and had promptly burned a hole through the right-rear mud flap… I had everything fixed other than the seat tear.
The factory running boards had been removed. I added the correct factory front mud flaps for that configuration.
The mileage was just over 198k when I bought it. I didn’t plan on using the drawer system so the owner kept that. Included in the purchase was $670 worth of maintenance parts purchased from CDan of ih8mud.
After purchasing the Land Cruiser, over time I embarked on a series of additional upgrades. These included:
- A Long Ranger 24-gallon auxiliary fuel tank with dual filler necks as imported by Man-a-Fre
- An ARB front winch bumper
- A Warn VR12000 winch with Viking synthetic winch line & Slee offset aluminum Hawse fairlead
- An INTI roof rack with 4 forward HID lights, an LED amber warning light, integrated LED sidemarker and brake lights, and a Land Rover worklight
- A Kenwood TM-D700A dual-band APRS-enabled ham radio with external Garmin marine GPS and antenna
- A Cobra 75 WX ST CB/weather alert radio with antenna
- An ARB safari snorkel
- An IBS dual-battery system with booster module and Odyssey batteries
- An ARB CKMA12 high performance onboard air compressor
- A Blue Sea fused terminal block
- Two dual-port Blue Sea USB terminals
- A Husky rear passenger floor mat
- A used Engel MT45 freezer/fridge with roller tray base & transit bag
- A custom mount for a 5lb propane tank
- Four rear cargo area tie-down loops
- The “pesky heater hose” and firewall heater hoses were replaced with silicon hoses
- The aux. fuel tank filter was replaced with a metal-body version, and a skid guard was added to protect the filter and pump
- Upgrading the headlight bulbs
- An old USN aircraft altimeter that used to be in my Jeep
Maintenance and repairs were also undertaken as needed. In addition to routine fixes of leaks, fluid changes, brake pads/rotors, etc.:
- The radiator, starter, brake booster and power steering unit were replaced
- An extension with a bend was added back on to the rear exhaust
- An exhaust hanger was added and the exhaust welded where I broke it
I’m probably forgetting some details, but I’ll update this page if I remember anything else, or make new updates.
Unpacking after a Road Trip
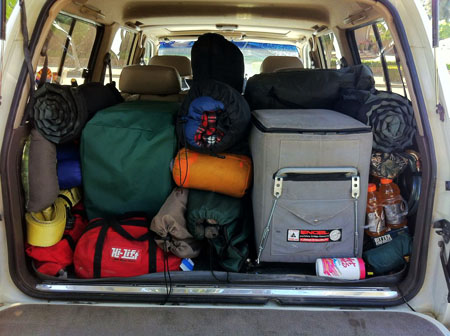
That’s a lot of gear to unload and store!
Because the Land Cruiser is also my daily driver, when I return home from a road trip I inevitably need to unload the vast amounts of crap vital equipment I’d brought with me.
It would be different if I was a “real” overlander who was on the road in his rig full-time. In that scenario, when you break camp you store everything in your vehicle until it is needed again, which is very likely the next night. There’s no transition between being on a road trip and back to the daily norm – they are one and the same.
For me, when the road trip (whether overnight or two weeks) is over and I’m home again, I need to get Toyotie unloaded and get the interior space back for other things. It also gets my valuable gear stored safely away and no longer vulnerable to quick theft. Reducing the weight in the vehicle also aids with fuel efficiency, since a heavier vehicle consumes more fuel.
So, all the gear gets unloaded. A few items that may have been unloaded for the trip are also put back inside the vehicle.
I’ve created a small photo gallery, showing a typical unpacking process. The details will vary from trip to trip, and the process (and gear) evolves over time, but the basics are the same.
What doesn’t change is the core fundamentals of this process: Each items is unloaded. It is inspected, cleaned, and repaired as required. Then it is stored away properly, wherever it belongs. This is repeated as necessary until all of the equipment has been dealt with.
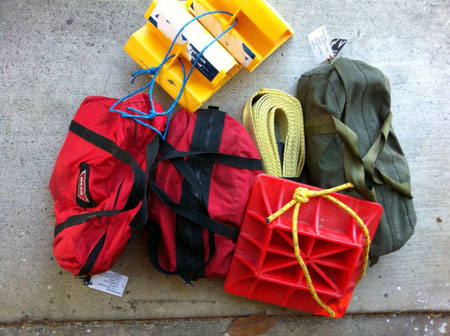
After a trip, the fundamentals are the same for dealing with all gear, whether it be a sleeping bag, a coffee pot, or recovery gear as shown here.
At the same time, there are similar checks and fixes as needed for the vehicle itself, but those are beyond the scope of this post. Suffice to say that any offroad vehicle should ideally be kept in good, reliable condition.
One particularly important focus of the maintenance is the camp kitchen. That includes the fridge and any food stored within the vehicle. This is the ideal time to get all the food out, including wrappers, crumbs, etc. My vehicle sometimes operates in bear country – like Yosemite – and it’s important not to give the bears any yummy incentive to smash their way into the Land Cruiser.
At the same time, when I’m out in the field on a trip, I sometimes can’t clean things as thoroughly as I’d like. This especially applies to cookwear, dishes, and utensils, which sometimes are scrubbed quickly in sub-freezing temperatures via the light of a headlamp. When the trip is over, it’s the ideal time to take a close look at these items and get them immaculately clean and sanitary once more.
I think that summarizes my post-trip process. It sets the stage for the next trip, and knowing that my gear is clean and in good working order – and that I can find it again!
Welcome to Last Year!

So there I was, relaxing at our campsite at Mountain Rendezvous 2012, chatting with Astrid of Overland Nomads. We were kicking back and talking about interesting places, or hotels, or the northern California area, or something to that effect. Or, more likely, all of the above and then some.
Anyway, somehow I ended up mentioning the tree cabin we’d stayed in the previous year – or was it the year before? We’d had a great time there, with the wobbly raised walkways swaying around as we navigated them on the way to our cabin. Astrid thought it sounded like fun and I’d promised to send her a link to my photos.
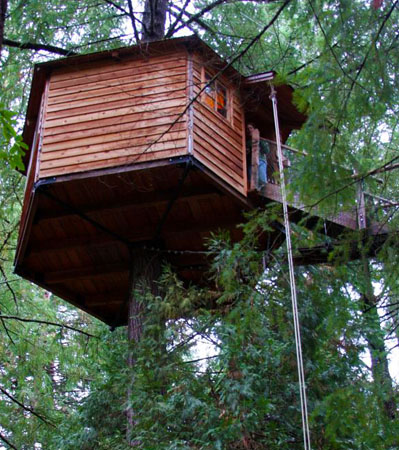
When I got home from MR, I figured I should send her the link to that trip gallery before I forgot, and that’s where things got interesting. I dug around everywhere, but I could find the gallery of photos for our 2011 Oregon trip. Before long, I realized that I had uploaded some photos to Twitter and Facebook along the way, but that I’d somehow neglected to make a proper trip photo gallery. I’s had a hectic business trip right after we’d returned, so it probably got lost in the shuffle.
Now I realized that none of the photos I took of our stay at the Treesort were online anywhere, other than a couple of snapshots buried in my Facebook photos. Neither were there any photos from my epic hike in the rain and 75mph winds at Cascade Head… This needed to be corrected.
So without further ado – and nearly a full year late – here’s the Oregon 2011 Photo Gallery.
Mountain Rendezvous 2012, N34º 09.913′ W116º 53.697′

I awoke at o-dark-thirty, pushed myself up and forced my reluctant eyes to focus on the clock. The alarm would be going off in two minutes, lovely… So I dragged my rear out of bed, regretting that I had gone to sleep very late the previous night. Still, it’s always different when you’re getting up early because of something you’re looking forward to. Just ask any kid on Christmas morning.
This time I was excited to be going to Mountain Rendezvous 2012. Like any proper road trip or get-away, I’d been looking forward to this one since the previous trip had ended. It had been a long seven weeks and I was more than ready.
I finished up my last-minute packing, chowed down on a quick bowl of cereal, and said goodbye to my sleepy family, who were still snug in their warm beds. I hit the road and an hour – and one nasty detour – later I was meeting up with Anthony & Astrid as planned, at Casa de Fruita in Hollister. I grabbed a large and much-needed cup of caffeine at the Chevron station and off we went, continuing the long drive south.
Mountain Rendezvous is held each year at the Camp Tahquitz Boy Scout property in the San Bernardino Mountains, northeast of Los Angeles, and just south of Big Bear. It’s not nearly as long a drive to get there as Desert Rendezvous (or Overland Expo!) but it’s still about eight long hours on the road. And since it was mostly on I-5, it’s a boring road too. Because I could only get away for a three-day weekend, that meant I’d be enjoying exactly one full day at the Rendezvous, sandwiched between two all-day drives. Would it be worth it?
