Update: Field Kitchen Project

While at Overland Expo 2013, I made sure to check out as many camp kitchens as I could. I knew that I wanted a proper chuck box for my own kitchen setup, and I really needed to get one prior to moving forward with that ongoing project. There wasn’t much point in buying things that weren’t needed, or wouldn’t fit, until I had made my selection, and that had stalled progress on the project for a few months.
The Kanz Field Kitchens were very appealing to me, but I simply couldn’t justify the expense. The bare field kitchen with the optional legs and cover would cost close to $900! And that’s before shipping costs. It was just too much for me to even attempt to rationalize.
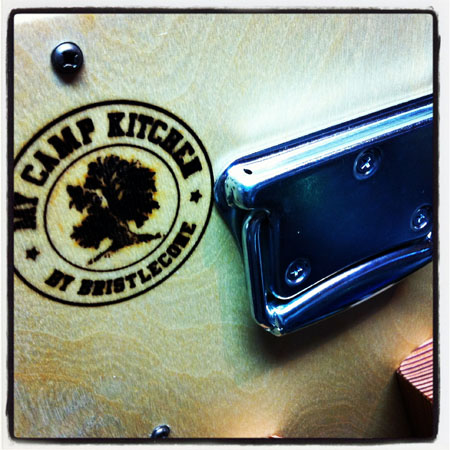
There was another vendor on hand at the Expo, however, called My Camp Kitchen. They offered a similar chuck box style in their Outdoorsman model, for about half the price of the Kanz models. Instead of being mostly metal as the Kanz kitchen boxes are, the MCK models are almost entirely wood. I preferred the metal myself, but again they were simply out of my price range. Wood would do.
I was able to inspect the MCK Outdoorsman and other models firsthand and I liked what I saw. They were pretty much just what I was looking for in terms of forma factor, quality, durability, etc. As an added bonus, everyone at the My Camp Kitchen tent was very friendly and I came away favorably impressed.
After I’d returned from the big OX13 road trip and settled in, I did some more research and pondering before deciding that I’d go ahead and order an Outdoorsman. I initially planned to order it in kit form, which was available as a money-saving option. It was at this time however that I discovered that MCK was having a big sale on an Outdoorsman package. Basically, for the price of a regular, assembled and finished Outdoorsman ($450-ish) you also got the protective cover, two counter top extensions, and shipping included. This was a really good deal, saving around $200, so I jumped at the opportunity and placed my order.
With the order placed on a Friday afternoon, I then exchanged a few nice emails with the folks at MCK who had asked if I wouldn’t mind if my order shipped on Tuesday instead of Monday. I thought that was very gracious of them to ask, and I told them it wouldn’t be a problem. They shipped the box out on Tuesday as promised and it arrived the following Friday afternoon. The box was thoughtfully packaged and arrived undamaged.
My initial impressions with the Outdoorsman are very favorable – with a few minor nitpicks. The workmanship, fit and finish are excellent. I expect this box to last a very long time. It’s far superior to anything I could have built myself!
I did note that there appeared to be a filled-in knot hole on one of the pieces of wood at the front. I kind of like it, as it gives some character to the otherwise plain Baltic birch plywood used throughout, but I imagine that not everyone would be happy about it.
Also, there’s a simple wood “cross” that holds the counter extension neatly against the back of the box. This piece is held on by a single, small screw that had barely entered the wood of the box. I tugged on it at one point and it pulled right off. Since I’m not normally planning to use the extensions anyway, I just left it off, but a proper repair (with perhaps a small bolt instead of the wood screw) would be a simple fix.
Those exceptions aside, I’ve found the Outdoorsman to be sturdy & well-built. The fold-down front becomes a useful counter top and it seems quite durable, and I was pleased that it has almost no play in it when used as a work surface. It’s a great place to chop vegetables & do meal prep, with everything handy in the drawers and shelves of the box.
You could place a 2-burner Coleman stove like mine on the counter, or on top of the kitchen box, but I don’t plan to. For one thing, I don’t want spills and grease spatters getting all over the box. For the most part, I intend to keep cooking on our ALPS Mountaineering camp table as we have in the past, with the Outdoorsman set up on its legs close at hand. This will free up a lot of room on the table.
In my case, the Outdoorsman replaces a large plastic bin that I had been using to store most of my kitchen gear. Some larger items, like my REI French press carafe, wouldn’t fit and were typically stuffed into the back of the Land Cruiser wherever they fit. The box also provides storage space for some food. My camp stove sets on top of it and is held in place by the vinyl cover for the Outdoorsman. All-in-all it’s heavier, larger, and more expensive than my previous setup, but at the same time it’s also more spacious, cleaner, and provides a neater, more convenient solution.
On a recent camping trip in the Sierra – the first real test for my Outdoorsman – we had a very large and solid picnic table at our campsite. I chose to set the Outdoorsman (sans legs) on one end of the table, and we still had plenty of room to cook, eat, and have a jerry can of water and more set up on the table. Chef Carrie and I were both happy with the box on this first outing.
Over time as I use the new chuck box, I’m sure that I’ll refine the contents and how they are arranged. One option is to move the dishes to the middle-bottom compartment and put my full stainless/clad cookware set in the larger compartment, but that cook set is way overkill for most of my trips, so we’ll see. I’ll keep you posted.
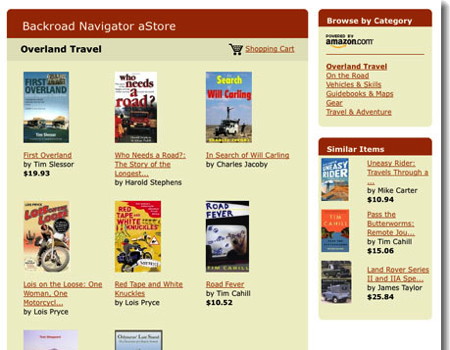
My New aStore
While working on new posts about my camp kitchen project, using the iPad for vehicle navigation, our weekend in the Sierra, etc., I also threw together my new Amazon Affiliate store.
It’s still a work in progress but you can check it out now. I get some absurdly small referral fee for anything you buy via the links in the store. It’s mostly books about overlanding, 4×4, adventure, and travel, but there are also things like maps and offroading gear. The store contents are all items that I recommend, so as I read new books and evaluate new gear I will be adding those things when possible.
Some of the books are out of print and available only used on the collector market, so watch those prices… Otherwise, happy shopping!
More on our Mojave Road Experience
Bryon of Exploring Elements has put up a great blog post about our time on the Mojave Road. There are photos, a fun time-lapse GoPro video, and Bryon’s recounting of the drive. He’s also included links to his large gallery of photos on Facebook, Anthony’s blog posts, and more. Check it out!
Adventure Trailers' Ultimate Puncture Repair Kit
As I mentioned in a previous post, I attended the excellent and informative Advanced Tire Repair class at Overland Expo 2012, which was taught by Martyn Davies of Adventure Trailers. During the class, Martyn used their “Ultimate Puncture Repair Kit” which he half-jokingly liked to remind us was available for sale on their website.
I left the class determined to upgrade my tire repair kit. As it was, I was equipped to repair a simple puncture, or even a small cut, but that was about it. Flat tires are perhaps the most common offroad – and on-road for that matter – damage I see, so I think it’s prudent to be prepared for when it happens. I’ve had quite a lot of rock battle-scars on my tires over the years, picked up a couple of nails/screws on the road, and after the 2006 GBES Rally I had a nail puncture that caused a pretty rapid loss of pressure. Fortunately it didn’t impact us during the rally itself.
My initial plan was to put build my own repair kit, since I already had some of the items that were in the pricey AT kit. After doing some shopping though, I came to the conclusion that it would not only be time-consuming to locate some of the items, but it would also be expensive. I’d have to buy the components from a variety of sources, each with their own shipping charges. So buying the AT kit wouldn’t cost more in the end, and it would save me a ton of time trying to replicate it myself. I bit the bullet and placed my order.
The kit arrived a few days later, and then I got a voicemail from AT on my answering machine at home. They’d seen that UPS had dropped off the package on my doorstep, and were calling just to make sure I had received it. I was impressed that they took the time to reach out just in case, and I appreciated that type of customer service.
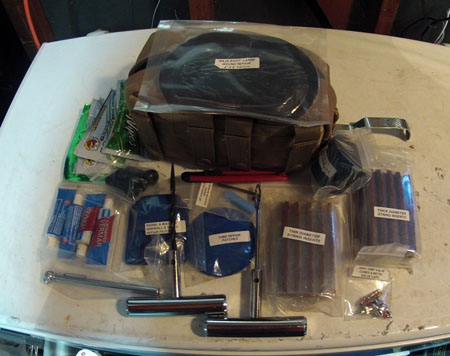
I was also really impressed with the kit. Not only does it have a pile of patches, valve cores, stems, tools, etc., but most of the items are in good-quality ziplock plastic bags and which are labeled. This keeps everything clean and free of dust, and makes finding things a breeze. I did place a few of the items (like the disposable hand wipes and the plug lube) into sturdy ziplock sandwich bags to help guard against leaks getting all over everything.
Here is the list of the kit’s contents, as stolen directly from AT’s website:
QTY- 25 THICK STRING INSERTS
QTY- 25 THIN STRING INSERTS
QTY- 2 VALVE STEMS (STANDARD PRESSURE)
QTY- 1 VALVE STEMS (HIGH PRESSURE)
QTY- 2 LARGE SIZE TUBELESS PATCHES
QTY- 3 MEDIUM SIZE TUBELESS PATCHES
QTY- 4 SMALL SIZE TUBELESS PATCHES
QTY- 1 4″ X 6″ LARGE WOUND REPAIR PATCH “BAJA BOOT”
QTY- 2 LARGE TUBE REPAIR PATCH
QTY- 3 MEDIUM TUBE REPAIR PATCH
QTY- 3 TUBES OF RUBBER CEMENT
QTY- 6 HIGH TEMP VALVE CORES
QTY- 4 STEEL VALVE CAPS WITH O-RING & CORE REMOVER
QTY- 1 4 WAY TIRE TOOL-HARD ANODIZED BLACK
QTY- 1 10 PSI TO 75 PSI PRESSURE GAUGE
QTY- 1 UTILITY RAZOR KNIFE
QTY- 1 BUFFER & STITCHER TOOL
QTY- 1 TIRE PROBE-CHROME PLATED STEEL
QTY- 1 NEEDLE INSER TOOL-CHROME PLATED STEEL
QTY- 2 EXTRA SET OF SCREW & ALLEN WRENCHES
QTY- 1 CHALK FOR MARKING TIRE
QTY- 3 HAND CLEANER WIPES-INDIVIDUALLY WRAPPED
QTY- 1 STORAGE BOX-DOUBLE STITCHED
Despite that lengthy list, there were several small items I added to the kit as well, which I felt were missing. It might be the “ultimate” tire repair kit that you can buy, but that doesn’t mean that it’s perfect.
First, I added two pairs of nitrile gloves. Hand cleaner is nice, but maybe let’s not get our hands filthy and covered in dirt, rubber and chemicals in the first place. With two pair of gloves, you can give a set to a helper as well.
For patching a tire from the interior, you’ll need something to remove the tire mold-release lube so that the patch will adhere properly. For this, I added a Simple Green wipe pouch that was given out as a freebie at Overland Expo 2012. I’ve often used Simple Green at home and know it’s an effective product, and using the pouch meant that I didn’t need to include a larger bottle that had more potential to leak.
For those nasty sidewall slices, I added very heavy, waxed cotton thread that was designed with leather working in mind, as well as a large, stout needle. I already had a couple of small spools of this thread at home so I selected the white-ish color (which would be easier to see and inspect) and added it to the kit.
Lastly, to prevent dirt, gravel, and other material from working their way into a repaired slice, I added a tube of Shoe Goo which Martyn had recommended. I actually had a large tube of Shoe Goo at home already, but it was too big for this application, and I was able to purchase an appropriate 1oz. size online.
My additions were all very small, so everything still fit neatly into the nice MOLLE bag that came with the kit, without overloading it. I added an inexpensive aluminum climbing carabiner to one of the exterior loops of the bag, so it could be carried hands-free if necessary.
With those additions, the kit now really felt properly complete. Outside of the kit, I also purchased a regular and a “deluxe” tire iron from AT.
I’m 100% with Martyn when he says that the best way to repair a tire is to bring it to a shop and hand over a few dollars to have them do it, but now I’m much better prepared to do it myself if I don’t have that option.
Note – Adventure Trailers has four videos on tire repair that are all worth checking out. You can find them all on their Tire Repair Clinic page or individually at:
Video 1: Valve stem repair
Video 2: Removing the tire from the rim
Video 3: Fitting the tire to the rim
Video 4: Major side wall repair

