Gear Updates – Mountain Rendezvous 2014 Edition, Part Two
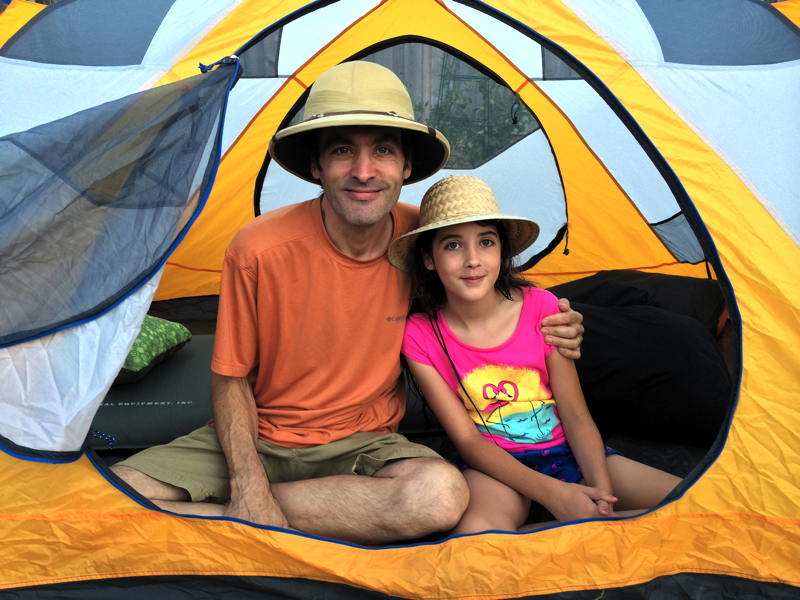
Intrepid adventurers in the Marmot Limelight 3P tent.
Part one of this gear update report ended with the Big Agnes Insulated Air Core sleeping pad, and I’ll begin part two with the other sleeping pad we used on our Mountain Rendezvous 2014 road trip.
REI Camp Bed 3.5 sleeping pad
We currently own a lot of sleeping pads. Over the years I’ve picked up some incredible deals on them, and a couple have even been free. I think I only paid full price for one. Among our vast collection, the REI Camp Bed 3.5 has been our sleeping pad of choice when car camping. We’ve even brought one on short overnight backpacking trips, although they’re rather big and heavy for that purpose.
These thick sleeping pads are of a self-inflating design, like a traditional Therm-A-Rest pad, where a sheet of open-cell foam is sandwiched between layers of air-tight nylon. Two valves are situated at one end to provide for inflation/deflation.
The relatively large size and weight are typically not an issue when car camping, which is where these sleeping pads really shine. With 3-1/2 inches of open cell foam, they provide all the cushion that most people would ever need, even if you’re set up on a rocky or otherwise less than ideal surface. And they’ll even do it without any air in the pad.
I know that because on our Mojave Road/Overland Expo 2012 road trip, I unrolled my Camp Bed 3.5 on the first night to discover that there was a long slice in the pad’s outer cover. I suspect it was cut by some part of our bed springs or supports, as I store the pads under our bed. Wherever the slice came from, it was an unwelcome discovery. I was fatigued and really ready to go to sleep, and I’d set up my tent on a section of gravel.
I was in no mood to try to patch this long slice, even if I could. I didn’t think my small field patch kit was going to be up for the extreme challenge, and a proper and permanent patch job would take hours to dry. I sighed and tentatively laid down on the pad to see how bad it was going to be… And I was pleasantly surprised that it really didn’t feel bad at all. In fact, it felt just fine. It would do.
Relieved, I figured I’d deal with it later and promptly got myself situated and fell asleep right away. And I slept great all night, other than being awoken by the fierce winds and passing trains there in Afton Canyon. In fact I was so comfortable, thanks to that thick foam, that I didn’t even bother to patch the pad until after the trip was over, eight nights later. I slept just fine every night, despite the fact that there was absolutely no air in the pad the entire time. And that made me a real believer in this sleeping pad.
We own three of these pads now. Pad #1 is my original pad, the one that got the slice in it. I have since patched it and it holds air fine. Pad #2 was purchased for Carrie at an REI used gear sale for 15 bucks, and came with a busted valve section. I took that out and sealed it up as best I could, but it leaks. Luckily, that’s not much of an issue with these pads and she’s used it many times over the years,
Our #3 Camp Bed 3.5 is of the latest generation of these pads. The valves have been redesigned (for better or worse I’m not sure) and the top surface has more of a soft feel to it. The included stuff sack is now much more generous in size, which is nice, but unfortunately several years ago they stopped including a patch kit.
We used Camp Bed #2 for Allison and #3 for me on this recent road trip, and both worked as expected. Allison is light so I didn’t even try to add any air to it, while mine held its air for two nights in a row without issue.
Where the extra size and weight are not a concern, I think that these are the best sleeping pad option out there. They’re comfortable, easy to use, self-inflating, and even if you pick up a puncture and are sleeping on top of large gravel, they still get the job done. Awesome.
The North Face Dolomite double sleeping bag
For many years, Carrie and I used a pair of inexpensive Slumberjack rectangular sleeping bags for most of our car camping. Roomy, flannel lined, and easily zipped together, they worked well for most of our needs. When one of the zippers finally failed, and resisted a proper repair, it became time to consider replacement options.
And so I discovered The North Face Dolomite Double sleeping bag. A double sleeping bag lacks the versatility of two separate bags which can be used solo or together, but we already had plenty of good solo bags to choose from. Getting a double bag would also save some space over the two bulky old rectangular bags, while at the same time the 20ºF rating would be an big improvement. After shopping around other double bag solutions from Big Agnes, Nemo, and others, I decided that the TNF DD would be a good choice for us.
The DD is a synthetic-fill bag, which isn’t be a drawback for car camping. It’s quite roomy, and very comfortable even though it lacks the flannel lining of the old bags. The first time I tried it out at home I almost fell asleep in short order. I took that as an excellent sign.
I actually spent about $20 more for this bag than I might have, opting for a previous year’s color combination that I liked a lot better than the current dark blue model. Normally I’m not quite so color-conscious but in this case I did think it was worth a little extra. I also had a gift certificate for Amazon that I was able to use to cover much of the purchase as well.
This road trip was our first time using the bag afield. Normally I’d plan to share it with Carrie, but this time Allison wanted to use it so she could snuggle up to her warm dad. It worked well and was warm and very cozy, although Allison did say she was cold one night. On the third night, she also barfed in the bag! Fortunately there wasn’t much and it was almost entirely water it seemed. I cleaned up as best I could and covered the spot with a camp towel, and we were fine.
So my early impressions of this bag are very favorable and I think it will serve us well for a long time. Hopefully barf-free.
Goal Zero solar power gear
As usual, I brought a plethora of Goal Zero solar power gear along on this trip: three Escape 30 briefcase panels, one Nomad 27 folding panel, one Extreme 350 power unit, one Yeti 150 power unit, two Light-A-Life LED lanterns (I really do dislike that awkward name), a charge controller, and a large ammo can full of accessory cables and such.
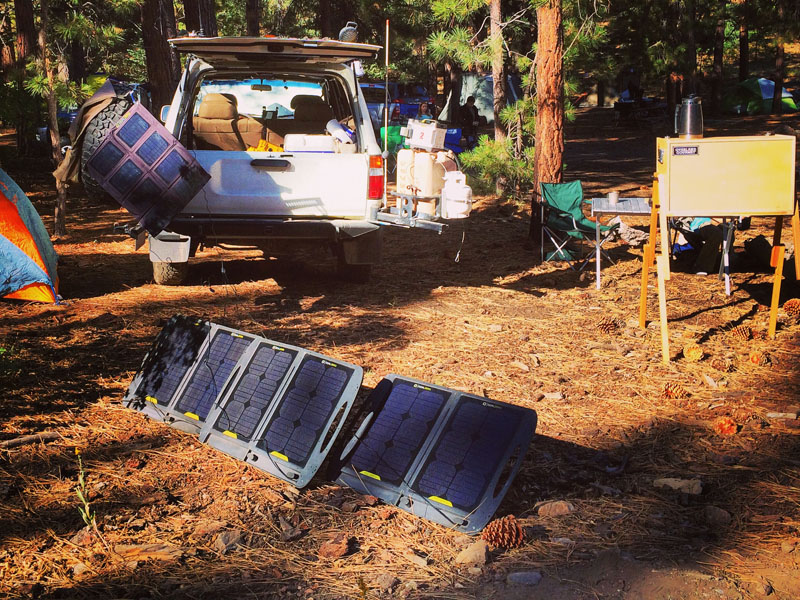
Solar panels deployed at MR14.
Many of those items are no longer available from Goal Zero, often being replaced with updated offerings. The new Yeti line of power packs for example is a nice update to the older Extreme 350 type units that I have been using, and feature built-in plugs of various kinds rather than requiring an add-on inverter.
On this trip, I used the panels and charge controller to keep the Land Cruiser’s main battery topped up, and ran the Light-A-Life lanterns from an Extreme 350 in camp at night. I also recharged our Canon dSLR batteries from the inverter attached to an Extreme 350.
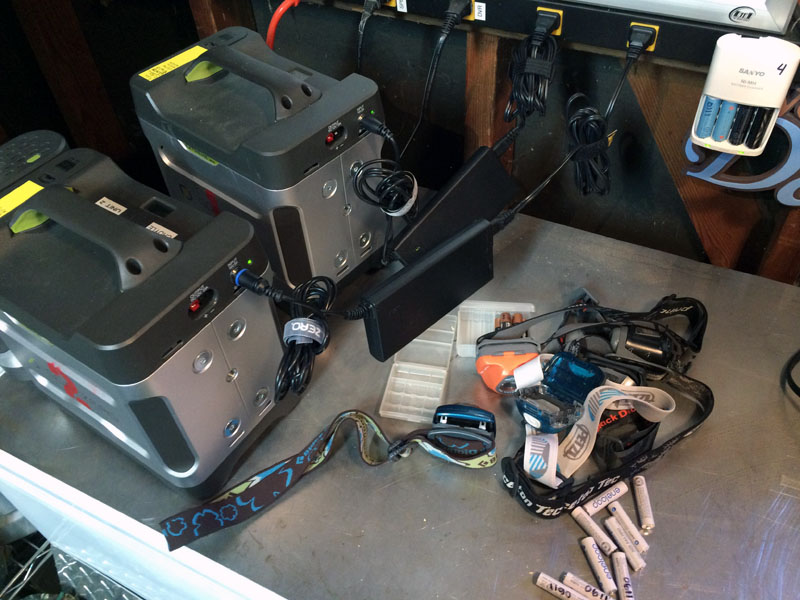
Extreme 350 power supplies, and various headlamps, getting a full pre-trip charge.
The four solar panels I had deployed added up to a rating of nearly 120W, but solar panels rarely bring in anything close to their ratings due to various environmental factors. The fact that we were camped among shady trees certainly limited their power collection, but there was still plenty for the basic needs at hand.
Solar panels were in use at many of the camps at MR14, as they are a popular and practical consideration for many overlanders who find themselves off-grid for days at a time, or longer. Beyond the practical considerations, it’s also satisfying to see such a “green” technology be embraced by the overland community.
I experienced no issues of any kind with my Goal Zero gear on this trip. I did wish for another extension cable that I could extend from my solar panels to the charge controller, but the two extensions I did have proved adequate. I’ll probably pick up another couple of extensions in the future.
Kühl Kontra Air pants
There are times when the weather is warm – or downright hot – and you’d like to be wearing some lightweight shorts, but circumstances suggest (or dictate) that long pants are in order. Outdoor activities like cross-country hiking, rock scrambling, and even overlanding can might be typical situations where long pants are the order of the day.
Where some leg protection is in order, say from rocks, thorns and thistles, ticks, or other hazards, a medium-weight fabric is often called for. This is at odds with also wanting to be as cool as possible, and that leads us to the new Kontra Air pants from Kühl.
What they’ve done is taken a robust medium-light weight material, not too heavy, not too featherweight, and done everything they could think of to make the things breath. There are numerous vents (eleven!) built in to the pants, along with a liberal use of mesh for the inner pockets. If there’s a cooling breeze available, they’ve tried to give it every opportunity to reach your skin and cool you down.
I must say that all that effort is only partially successful, and in no way are these pants as airy as any pair of shorts. That said, if you need the protection of long pants even though the weather would be perfect for shorts, these make a pretty good compromise.
There are some questionable design choices, in my opinion, including a snap rather than a button as the main closure. I feel that the snap is more prone to failures, or just popping loose. The inclusion of a “French fly” (an extra buttoned flap behind the zipper) is an unwanted nuisance. Also, when the front zipper pull is at the top of its travel, there is still a substantial gap – nearly half an inch – of unzipped zipper left above it. I’ve never had that sort of gap left with the zipper all the way up, and it strikes me as poor craftsmanship. Fortunately, it’s well-covered by the zipper flap.
A larger-capacity cargo pocket, say big enough for a map case, would serve me better than a trendy smart phone pocket. But perhaps these things are because I’m not quite in the target demographic for a brand called “Kühl”.
The pants are a poly/cotton blend. They dry reasonably fast, but nothing like the pure nylon fabrics do. The fit and cut are good, offering good mobility and flexibility without being baggy.
Overall, I like these pants, despite a number of reservations about some of the details. Still, I expect to wear these often until I find something better.
Marmot Limelight 3P tent
I’ve had our Marmot Limelight 3P tent for two years now. On the heavy side for backpacking (like most other 3-person tents) it’s very reasonable for car camping. Packed up, it’s about half the size (and weight) of our REI Hobitat 4-person tent.
One of the nice features of this tent is that it comes with a footprint, which is usually an optional extra to purchase. Other features include interior corner pockets, a gear loft (also included), and a small window in the rain fly. The tent is one of the easiest to set up that I’ve ever used as well.
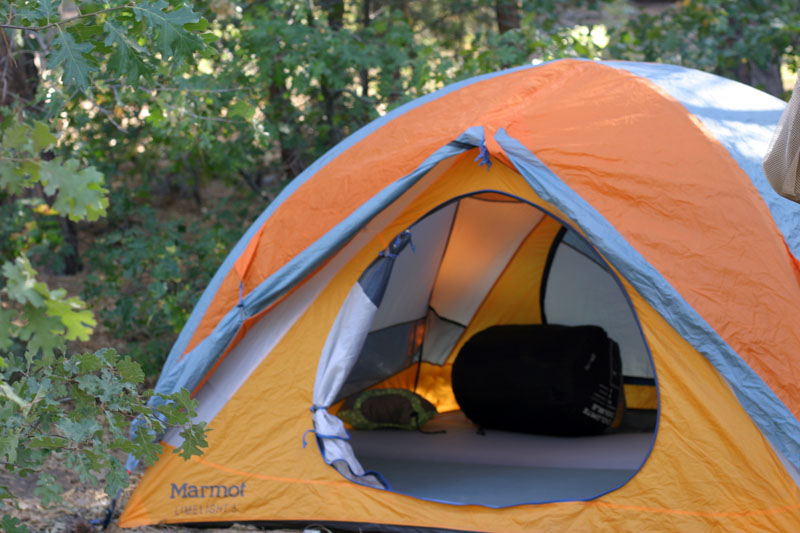
The Marmot Limelight 3P, our home for three nights on this road trip.
Inside, things are a bit tight for three people, but you can do it and still have room at one end to jam in everyone’s packs.
We use this tent for family backpacking trips, or when car camping with just one or two, when it provides plenty of room. When car camping with the whole family, we opt to use the Hobitat tent which gives plenty of room for extra crap, er, gear and bags, as well as interior height for the adults to fully stand up.
About my only complain about the Limelight 3P is that the zipper flaps on the rain fly like to get caught in the zipper pull. In contrast, the tent door zippers work better than those on most tents and are mercifully snag-free. Also kudos to Marmot for providing two full doors, one on each side of the tent.
A few of those zipper snags aside, the Limelight 3P gave flawless service again on our road trip, providing a comfortable shelter for three nights in the mountains.
Adventure Tool Company expedition map case
Well, where to get started on this piece of wonder?
I’ve owned several map cases over the years, most of a similar size to this one. But they’ve never been anything like this nice. This is a waterproof canvas case, all genuinely Made In USA, and how often can you say that anymore?
The ATC expedition map case is similar in size to my old and well-used Cordura map case, but the canvas makes it much stiffer, and bulkier. That’s a good-and-bad combo, although if you’re mostly in a vehicle a little extra weight here is meaningless. It will require a substantial cargo pocket if you’re going to have it tucked away there in your pants while hiking or backpacking though.
The presentation of this case when I received it from maker ATC was quite exceptional, and included a personal note of thanks for my order. This is how it looked:
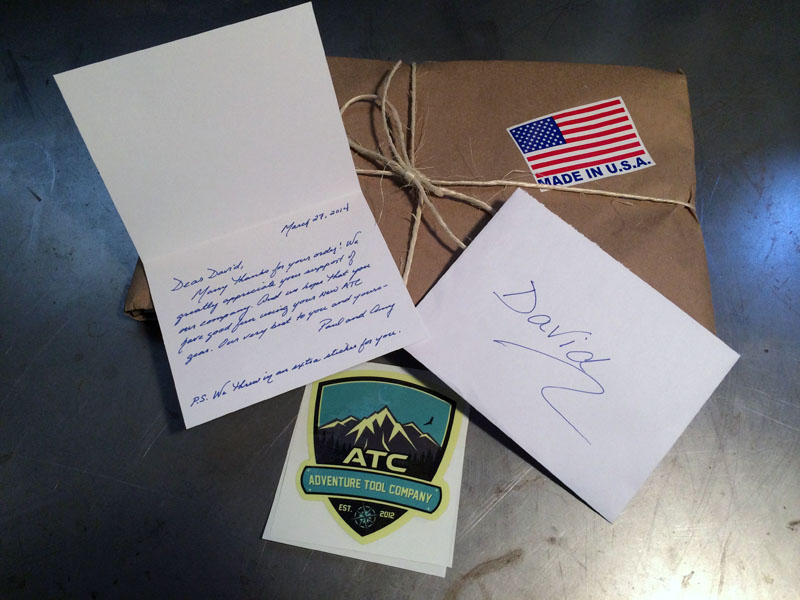
This case was an excellent size for our road trip. It held a copy of the San Bernardino National Forest OHV trail map and kept it handy for me in the driver’s door pocket of the Land Cruiser, available in an instant as required. And believe me, I was referring to the map quite often for a couple of days, as I attempted to navigate the various trails and surprises of closed gates along the way. The entire time, the ATC map case protected the map from rain (there was none), dust, dirt, and me.

Unfolded ATC map case
Not only is the case construction exceptional, but at 35 bucks it’s also reasonably priced for what you get, and it even smells good too.
ATC also now offer a larger Atlas size case, sized to protect larger gazetteer style map books such as those from DeLorme and Benchmark Maps.
In a world where it can be difficult to avoid low-quality Chinese products, the ATC map case is a remarkable exception that truly excels. I suspect that mine will last my lifetime, thanks to the high quality materials and construction. Well done, ATC.
Conclusion
That wraps up my gear updates from our MR14 road trip. Of course there is a wide variety of other equipment we used on this trip, but this covered all the things I felt the need to comment on. Next time around I’m sure the mix will be different.
If you have any questions, comments, or personal experience to add, please feel free.
Most of this gear isn’t relevant to how we do things lately, however that is a super terrific photo of you and A!!!
October 18th, 2014 at 9:15 am