Toyotie, part 10: Taking Stock

So… I’ve had Toyotie for a couple of months now. It came to me with a few key mods already in place. Since then, I’ve installed the ARB front bumper and Warn VR12000 winch, replaced the interior lights with LEDs, gotten the Sirius XM sat radio working, installed the RAM Mount for the iPad 2, and replaced the anemic stock horns with aftermarket ones that sound normal. And a few other things here and there.
I’ve also worked on some associated projects. I’m slowly picking up bits and pieces for the camp kitchen, putting together an updated tool kit, and updating my recovery gear.
For the near future, there are other mods that require multiple parts, or are really multiple modifications that I plan to do at the same time. The radios – CB and ham – are a good example. Each consists of a radio, external speaker, antenna cable, antenna and mount, and all of the associated wiring. I’ve gathered up the parts for a couple of these projects and have others on the way. Still others will be ordered when my budget allows.
With the auxiliary fuel tank in place, it’s now time to take a step back and consider how the next puzzle pieces should fit together, and in what order. And I may as well write a blog post out of this, because it’s going to help me think things out and get it all written down. Key the 200-yard stare and absent-minded tapping of a pencil on my desk…
There are several smaller things that will get done, but they can be done at any point, really. The planing is most needed for two more involved projects:

Project #1: Roof Rack
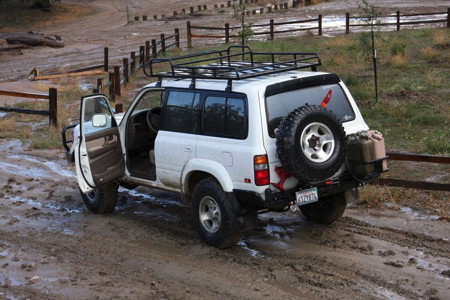
The roof rack forms the basis of this project. The rack itself is a custom one, and while it’s good overall it does need some attention. First, it has small gaps in some of the welds. Jeff, my Jeep shop guy, actually snickered when I mentioned these. Those welds need to be cleaned up to prevent cracks/breaks and to keep water out of the interior of the steel tubing.
Next, the current rack floorboards are made of marine-grade plastic slats and they really have to go, because they suck. A replacement floorplate or slats needs to be put in place, preferably one that doesn’t block my beloved moon roof. Tabs for lights in the front will also be added, and the whole rack should be powder-coated in lieu of the current spray paint.
Next, the CB and ham radio antennas need to be wired and mounted to the back of the rack. I also plan to move the excellent Land Rover work light off the back of the Jeep’s roof rack, to a comparable spot on the Land Cruiser’s rack. Up front, driving/spot lights will be mounted. All of the lights will need to be wired in properly, with switches installed on the dash.
A couple of sets of Quick-Fists will probably wrap up the roof rack project.
Project #2: Power
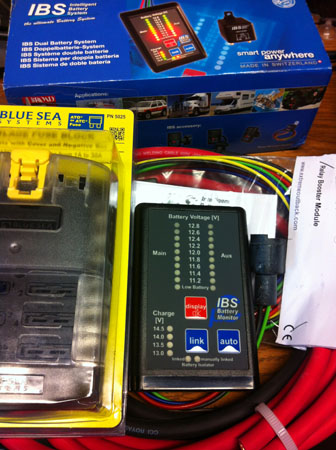
This project involves setting up the dual-battery system and a six-terminal block under the hood. The second battery tray (and prerequisite relocation of the washer bottle) come in the form of two kits from Slee Offroad. Then the second battery (exact battery TBD – perhaps my spare Odyssey) goes in and the IBS dual-battery setup is installed.
In the meantime, the 6-terminal block is also installed somewhere under the hood, and it provides the wiring destination for all those lights and the ham radio in that other project. That means that while some of the work can obviously be done in parallel, really this power project is ideally done as a prerequisite to the big roof rack project.
There are other modifications to be done – the intake snorkel, dealing with the cargo area, axle breather extensions, mounts for a fire extinguisher and the PowerTank, installation of an ARB compressor, etc. But the two projects above comprise the remaining two confirmed big projects I have in mind for Toyotie. I’m hoping that after those, I’ll only have small mods remaining, and I can concentrate on completing the camp kitchen project.
Toyotie, part 9: Seat Time
Wrenching and upgrades are all well and good. But there’s more to getting to grips with a new vehicle. You have to actually drive the thing too.
With Toyotie, things went about as you would expect. It started off as a daily driver as I figured out what exactly all those buttons did, how it handled on the road, what kind of gas mileage I should expect, and so on. With time, you build up experience and you learn how the engine sounds, where the gauges should be registering, roughly how much gas is left when that pesky low fuel light comes on, etc.
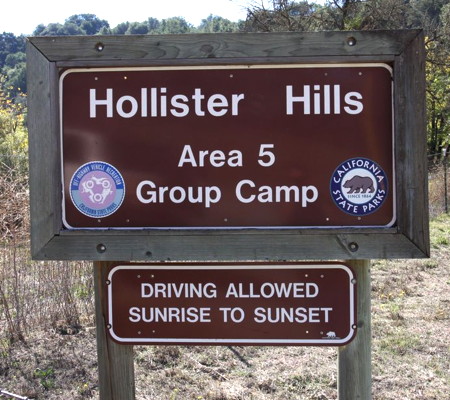
The Overland Rally & Workshops at Hollister Hills arrived while much of the build was in process, but it provided a good opportunity for the first offroad driving experience in the Land Cruiser. Most of this was done after the event had completed and I was able to methodically put Toyotie through her paces on my own.
Of course, after that brief experience I was eager for more. I’d also been wanting to do a South Bay dirt road run since Sammydee had gotten his own Toyotie, a bright yellow FJ Cruiser he named “Tidy Tip” after the flower that matched his vehicle’s color scheme. So I put the word out to a few of the usual suspects and we organized a low-profile, half-day drive through the Santa Cruz Mountain backroads and dirt roads, ending in Corralitos for a late lunch.
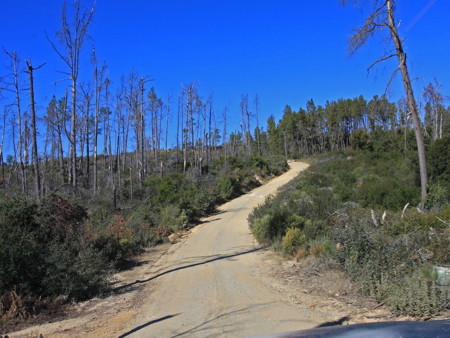
Two weeks later, pretty much the same crew got together again (adding Bill in his JK, with Jim in the passenger seat this time) with the idea of getting more offroad seat time by exploring the new Hudner property addition at Hollister Hills. As it turned out, that section is apparently only available via an extra fee, something we were annoyed to discover. On top of that, sixty seconds before I pulled up at the gate it decided to start raining!
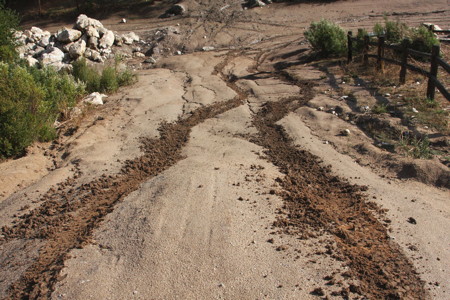
Hollister is known to be treacherously slippery when muddy, even with mud tires, which only a few of us had. So we resolved to go check out the lower elevations at the Upper Ranch 4×4 area and see what the conditions were like. We quickly had our answer: muddy and very slippery! Just as expected.
So we spent probably an hour driving around, blasting and sliding around the old obstacle course area before breaking for lunch. The rain had stopped while we were driving, but returned while we had stopped to eat. Before I knew it, small rivers had appeared under our (thankfully covered) picnic table! Even the few other guys that were there – with dedicated trail rigs – started trailering-up and bailing out.
It was getting cold and we’d had our fun so we called it a day. I stayed behind to run a few more trails for maybe 15 minutes after the others had left. Since I was solo though, and would therefore have to self-rescue from any mud-induced trail offage, I headed home too.
Because we’d ended early, and I was traveling solo, I was able to cruise along at my own pace and pull over whenever the urge struck. I stopped for a photo here and there, and picked up some garlic-stuffed green olives at the Garlic Shoppe in Gilroy on the way home.
It was good – and good fun – to get more seat time and to be able to push the limits some at Hollister. And spending the time with friends in interesting places only made it better.
Check out the galleries, then please come back and post here if you have any comments.
Santa Cruz Mountain Run gallery
Hollister Hills Mud Run gallery
Toyotie, part 8: Front bumper & Winch Install
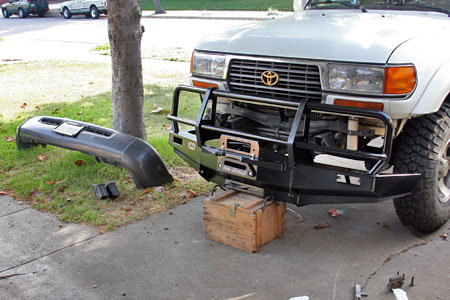
I knew early on that I wanted to go with the ARB Deluxe (winch) front bumper for the Land Cruiser. It had an excellent reputation overall, and I loved the looks and functionality of the bumper. By ordering the bumper from Man-A-Fre at the same time as the auxiliary fuel tank, they could bundle them together and save me a good chunk of money on the freight cost. I placed my order and several days later they were in my garage.
Around that time I’d been making my mind up on the winch specifics. I opted for a Warn winch, because I was familiar with them and their quality, having their x8000i on the Jeep. While I’d originally planned to swap that winch over to Toyotie, I realized that the 8,000lb rating really wasn’t adequate for the new beast. After researching options, I settled on a VR12000, a powerful winch designed with some economy-minded components for those of us that don’t use the winch frequently. It’s still backed by Warn’s full warranty though, and I’d not been able to find anyone that had one fail them.
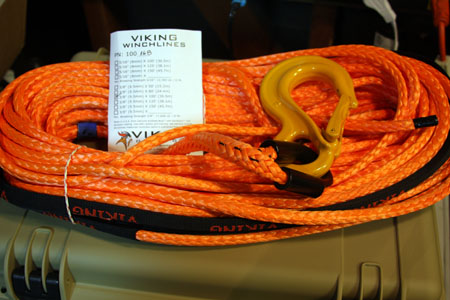
I also decided that I wanted to use synthetic winch line, having done my research there as well and being familiar with the many pros and cons vs. traditional steel cable… Too many to get into in detail here!
One factor I will mention though is weight, with the synthetic line saving roughly 23 pounds. On top of that is another ten pounds of saving by using a 2lb. aluminum Hawse fairlead instead of the standard Warn 12lb. steel roller fairlead. The new bumper & winch were adding enough weight as it was, so 33 fewer pounds was a welcome reduction.
So finally one weekend I had time to get it all installed. It took a lot longer than I expected, mainly due to challenges of getting the winch mounted to the bumper. Some of that was absolutely my fault, but not all of it.
The directions were wretched: ARB makes a fine bumper but their directions are about as useful as a bright green spy, to use a Jeremy Clarkson line. Getting past the typos and incorrect references, the main instruction for ARB’s bumper and the spacer kit do not contain a single photo or illustration! The sub-kit for the bumper turn signals do have them, thankfully, but for the rest you’re on your own.
Well, not completely on your own, thanks to the internet. I was able to make good use of a couple of online resources, thanks to people that had installed the bumper on their Land Cruisers and thankfully documented the process. The one I relied on most was this very helpful post at PNW Backroads Adventures and the related Flickr gallery. (I should note that while that page says “It’s a lot easier to wire in the turn indicator pig tail before the bull bar is installed,” I personally did not find that to be the case.)
While I had a lot of challenges and some frustration, I should also mention that I did this install completely solo! I wouldn’t recommend it, but I wanted to see if it was possible. With a bit of strength and a little creativity when needed, I proved that it can be done by one stupid person.
It did feel good to overcome the challenges and get it done, and by myself to boot. The bumper turn indicator lights were a straightforward install, as was getting the winch power hooked up to the battery and controller box. Getting the Viking synthetic line installed on the winch was a breeze, and then I was done.
I didn’t feel the need to completely document the process since it had been covered pretty well elsewhere, but I did take photos along the way and they’re in this gallery.
Overland Rally & Workshop: Hollister Hills, 2011

Shortly after purchasing Toyotie, I had registered for the second annual Overland Rally & Workshop at Hollister Hills. I had wanted to go to the first one in 2010, but at the time my budget had cratered and the Jeep needed a lot of work, so I had to pass.
This time around I had fewer roadblocks. Still, I had already allocated my remaining vacation days through the end of the year, and had family obligations for Friday evening and Saturday morning. That meant I would miss Friday and the first training sessions on Saturday morning.
But I could get there, get settled and socialize over lunch and be ready for the afternoon Advanced Vehicle Recovery class. After that would be dinner and a string of presentations to wrap up Saturday. After camping overnight in my tent I’d hang out until things wrapped up sometime around noon on Sunday.
Saturday morning eventually arrived, so I finished loading up the Land Cruiser and off I went.
None of the organizers were around when I arrived, but I asked around and some random people showed me where to sign in and such. I located a place to park and set up my tent, and quickly spotted (or was spotted by) people that I knew online. It was great to meet up with these folks in person, and it was nice not being a total stranger among a crowd of people I’d never met in person before.
In fact, it was the people that I valued most from attending the event. It was nice to settle in among new friends and geek out on various subjects that everyone was enthusiastic about. We talked about travel, vehicles, gear, mishaps, all sorts of challenges, beer and food, technology, politics, whatever.
Before long I was able to attend Scott Brady’s Advanced Vehicle Recovery session. There was an overview of recovery equipment and techniques, with an appropriate emphasis on safety. I was generally familiar with this, but took notes and happily learned a few things, which is why I was there. A junked Jeep Cherokee was recovered from laying on its roof, and the class was concluded with some Q&A.
This was followed by more open/social time which I took full advantage of. I also finally set up my tent (having meant to at least twice before, but having been sidetracked both times) and then it was time for a nice BBQ dinner and of course more socializing. I stopped by Marcos’ camp and was treated to a nice glass of wine and some steak he’d grilled on his awesome new Snow Peak grill he’d just purchased.
After dinner the presentations began, adding more energy and inspiration to the event. It was an extremely positive experience. After Luis of Lost World Expedition wrapped up the final presentation, I made sure he got a beer in his hand, stat! There was still more socializing around the campfires, as people slowly trickled off to bed. I think I finally turned in around 11:30, after drinking a lot more of my beer provisions than I had anticipated!
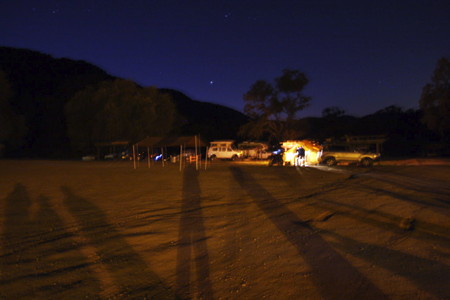
I settled in for the night to the sound of crickets, and coyotes yipping on the nearby hills. I slept very well in my warm mummy bag…
I was up early the next morning to make my coffee and breakfast on the convenient tailgate of the Land Cruiser. While several vehicles lined up for the rally challenge, I broke camp, socialized some more and checked in with some of the vendors. I also took Luis’ diesel-converted Series 80 Land Cruiser for a spin.
By noon, things were winding down and people were trickling out. Eventually I managed to say my goodbyes too, and I went off to hit some of the trails and get my first real offroad experience with Toyotie. The 80 is certainly larger than my Jeep but things are too drastically different.
I chose a scenic route home, with a stop at El Toro Brewing in Morgan Hill for lunch and a pint. It was a good weekend!
If they hold the Overland Rally & Workshop at Hollister Hills again next year I’ll probably go again. The classes are extremely brief, but the presentations, socializing and networking, and the energy more than make up for it. And the cost is very reasonable.
Some people I spoke with made observed that attendance seemed down overall, with fewer vendors as well, but one person felt there were more vehicles actually out on the trails.
Hopefully a schedule and list of classes and seminars will be made available *much* earlier next year. This year, the list of classes was not made available until just five days prior to the event, something I know cost them signups.
I would say that the event surely isn’t for everyone, but if you’re interested or involved in the “overlanding” style of offroading & travel then attending should probably be a no-brainer for you.
